Posts

Showing posts from October, 2020

Detailed Breakdown of the Nerf Hammershot

Image
  The Nerf Hammershot is a five round revolver released in 2013 as part of the Zombiestrike line. Notably, it was the first Nerf blaster to use a hammer cocking system, which allowed it to be primed with only one hand. There were other single handed priming mechanisms used in the past, such as the trigger pull mechanism used on the Dart Tag Snapfire, but the hammer prime allowed for much more power and greater springloads, while having one of the best triggers in the business. Three new colorways were released in 2020 as Amazon exclusives, and I picked up the "Caution" colorway during a sale. Here we will be taking a deep dive at the internals, with detailed notes and disassembly instructions. Plenty of reference photos will be provided along the way. Disassembly Disassembly starts with first removing nine screws on the shell, labelled below. The screws are the same throughout the exterior of the blaster. The nine screws holding the bottom shell together Once that's been ...
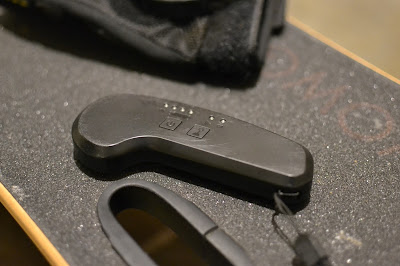
Electric Mountainboard Build Part 1: Planning

Image
My OG board, the Wowgo 2S Most longboards are great on road for getting around. However, as soon as you get any sort of rough roads or terrain, you're pretty much screwed. Enter the mountainboard, with massive trucks, pneumatic tires, and bindings. However, they're pretty much limited to downhill runs, because it's nearly impossible to push on them due to the ground clearance and bindings. Electrification makes them far more practical, and they're the perfect platform for off road and trail riding. My current Wowgo 2S is pretty limited in terms of performance and capabilities, so I wanted a new board. This marks the start of my build process, and I expect it to be completed in roughly six months, just in time for the season to begin. This is subject to change based on availability and just overall plans. Example of a mountainboard, an MBS Comp 95 "Birds" Considerations There's a few different options available now for AT boards, so why did I choose to go D...

Designing the SE Berm

Image
The Berm, with a straight handle After the Mesa, I wanted something simple and easily repeatable, as that would make it easier for others to reproduce it as well. To that end, I wanted to try to make it completely 3D printed, and not require any other tools to build.  Initial Design I had some ideas for what I wanted. It definitely would have to be a pistol format, and I wanted a simple design. I had some ideas for a Welrod style blaster, so that's what I decided to focus my efforts into. While working on figuring out a mechanism for a magazine version, I decided it would be easier to just start out with a single shot variant. The Welrod style also helped with some design criteria for the blaster. True to its stealthy covert origins, I wanted my blaster to be quiet and inconspicuous. In addition, I gave myself the challenge of making it completely without any metal, which means no conventional springs or screws to hold it together.  The Welrod MkII, the inspiration for this bu...

Updates to the Barndoor Tracker

Image
So after two runs outside, I found a couple of places where the tracker could be improved. I will detail the issues and solutions from my experience, as well as the final results. Click here for the original build log.  Polar Alignment The most noticeable issue I had was with aligning the tracker to the pole. If the hinge wasn't pointed exactly at the pole, I got a lot of trailing and loss of tracking after an hour or so. It was actually bad enough that the stacking software did not recognize any stars in any of the images. Yeah, those stars don't cut it This issue is due to user error, and with enough training and practice, I am sure it can be done reliably and accurately. However, I wanted to make my life a little easier and make setup faster, so I needed a way to point the tracker towards Polaris with good repeatability. To do this, I salvaged a cheap spotting scope from a $20 telescope, and attached it to the hinge. After zeroing it, it made the alignment process far easier...

Building a Simple Barn Door Tracker

Image
The tracker, with a Nikon D3100 mounted to it If you've ever tried taking pictures of the stars with a camera, you'll quickly notice two issues. One, it's really dark and it's almost impossible to see anything without a long exposure. And two, once you do a long exposure, the stars start smearing into little lines. So why do you get these trails? Well, the Earth is actually spinning on its axis, and the trails you see is actually the Earth's rotation. The stars haven't moved, but the Earth, and by extension the camera, has, and gives you that motion blur.  Those stars should be round! So how do you fix this? You can simply spin the camera at the same speed as the Earth's rotation, cancelling out the spin. Now you can buy a tracker for well over $300, or you can build your own with some simple parts for $50, or less if you have some of the hardware components, which are very commonplace. There are several designs out there, and I chose to make the curved rod ...